|
nForce 2 Overclocking - Level One Continued...
|
| |
|
FSB - Front Side Bus
|
| |
|
FSB overclocking has the advantage that the increments are much smaller and there for allow for better fine tuning of
the systems overall speed. On the NF7 the FSB is adjustable in 1 MHz increments (except for the absence of a few FSB
speeds which is odd to say the least). Using the CPU’s default multiplier of 11.0x, each 1 MHz increase in FSB will
give an extra 11MHz of CPU speed (1 FSB x11 multiplier). This helps when you get near the CPU’s ceiling which you
established earlier which is pretty much a ball park figure of where your CPU will max out prior to voltage adjustment.
As you may find you CPU won’t complete Prime95 at 2241 MHz (166x13.5) but will at 2210 MHz (170x13). As you can see, 11
MHz jumps can have an advantage over 83MHz jumps in terms of narrowing down where your CPU’s limits are. However if
initial FSB overclocking is done in the wrong order you can often run into difficulties. The FSB increases the speed
of the entire system, this includes the memory, CPU, PCI and AGP buses. If all of these are done at once then
establishing where the bottleneck lies can be a nightmare. Even though we can further increase the CPU speed here we
are not going to do that in the initial part of FSB manipulation, instead we are going to work on memory performance
and furthermore the potential bandwidth you can gain from it. As the Nforce2 has a PCI and AGP lock we don’t have to
worry about the potential problems from FSB overclocking, if you have a chipset other than an nForce2 such as VIA
chances are you don’t have a lock and may run into problems. Although this guide is solely for the nForce I’ll touch
up on potential workarounds for other chipsets later.
|
| |
|
Firstly you will need a bootable floppy/CD with memtest86 on this is to test the memory’s capabilities. By running
tests 5 and 6 error free will indicate whether or not your memory is capable of a running higher speed while
maintaining reasonable stability. Right to eliminate any potential buggy bios fsb/multiplier combination, which is
known problem with the Abit NF7 and certain bios versions drop the multiplier to 9.0x. Now I know this contradicts
initial CPU testing but in this first phase of memory testing we don’t want to run into any issues we’ll get back up
to speed later. Next on epox/abit nforce2 boards there is a bios setting called "CPU interface", it is very important
this is enabled at this stage. A lot of theories regarding what it does are floating about, the main thing is if its
disabled your memory performance drops by as much as 20%. This means you may be able to hit a FSB of 200 with it
disabled but in terms of raw performance it may in effect be slower that 190FSB with CPU interface enabled. My theory
is that it enables the memory to run with a 1T-command rate rather than 2T hence the increased memory performance.
In a nutshell enable it, it’s faster with it on.
|
| |
|
Depending what board you have there will be a setting known as "DRAM Divider" , "CPU / FSB DRAM Divider" or "CPU / FSB
DRAM Ratio". This determines what speed your memory runs at, at any given FSB. These settings can be shown in
different ways amongst different boards on the NF7 they show as 3/3, ľ, 3/5, 3/6 ~ up to 6/3, 6/4, 6/5 and 6/6. On
other boards they can be shown as ratios or percentages. So what these do is take the FSB divide it by the first
number and multiply it by the second. For example at 5/6 and 166FSB the following calculation is applied, 166 divided
by 5 = 33.2 multiplied by 6 = 199.2 MHz. This is what as known as "async" as in asynchronous to the speed of the FSB.
Although a 5/6 divider at 166FSB may seem like a good performance increase, running asynchronous on an Athlon XP based
system has very little gains and is not a recommended route. It is however a great way of establishing whether the
memory or the chipset is bottlenecking your system at higher FSB levels. Therefore stick to using "synced" settings
i.e. 1:1, 6/6 or 100% depending on how your board interprets it so your FSB runs at the same rate as your memory.
|
| |
 |
| |
|
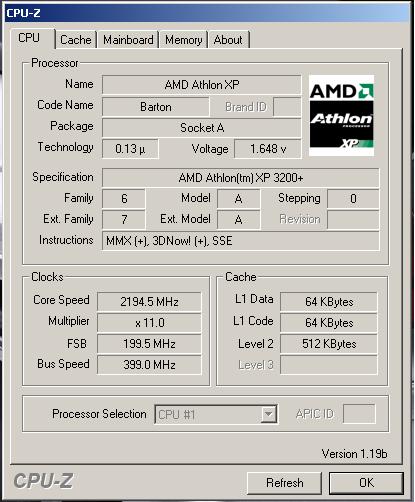
So go ahead and increase the FSB in increments of 5 MHz and run memtest86 tests 5 and 6 each time. Depending on what
kind of memory your using "Barton" cored Athlon XP’s are almost always capable of 200 FSB so make that you initial
goal, if you find a setting wont boot, go up in 1 MHz increments. Some settings are just not liked and you may find
say 174FSB wont boot but 173 and 176FSB are fine. Once you hit 200 FSB or you reach you limit and it completes memory
test. Return to the bios and calculate what multiplier you need at 200FSB to get your CPU running at the speed you
initially found stable. For example, if you found 2200MHz your best stable speed set your FSB to 200 and your
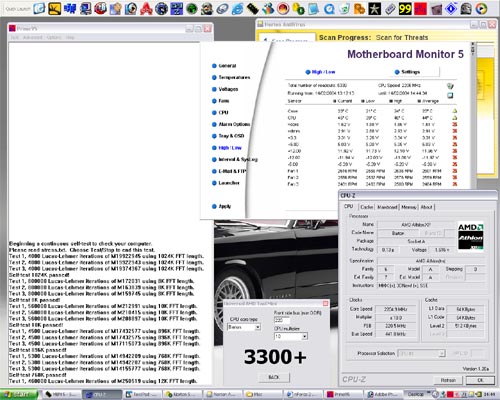
multiplier to 11.0x and re-run memtest86 tests 5 and 6. If it completes them, go ahead and boot into windows.
Bring up your temperature monitor and check both the system/board and CPU temps, consider 33*C/45*C acceptable
idle system/cpu temps respectively. Keep you monitoring program in view and load up prime95, select "torture test" from the
menu and check the 3rd radio button down from the top and ok it. Now watch it run, let it run until the first three
1024K iteration tests are "passed ok". If it passes them and your running on either an Athlon XP2500+/2800+/3000+
congratulate yourself on gaining the exact same performance level you would have if you had bought and XP3200+ as
that has a 200FSB and 11x multiplier pumping out a nice 2.2GHz. For those with an XP2500+ this is a rather good
feeling as the chances are a 3200+ cost around 2 to 3 times of that of the 2500+.
|
| |
|
Now those of you with PC3200 memory or good PC2700 may want to keep on going on the FSB, so keep upping the FSB bit
by bit and running memtest86 each time. Remember to keep the multiplier at a level which you’ve established results
in a CPU speed you’ve proved stable. If 2200 MHz was you best stable clock speed drop the multiplier to 10.5X until
you reach get the CPU back up to 2200MHz. That’s around 209x10.5, if its still copes with that by all means carry on,
dropping the multiplier to 10x until your CPU comes back up to 2200MHz (220FSB x10). Remember it must complete
memtest86 tests 5 & 6 to prove relatively stable. There is the chance you will get into windows at a speed memory
test produces errors, but there are consequences. If your memory causes a serious error you may end up with a nicely
b0rked OS and have to spend the next hour or so re-installing your favourite bloatware. Also make sure prime95 will
pass the first three 1024K FFT’s with no errors.
|
| |
|
| |
|
Again at this stage I suggest running prime95 for around 2 to 8hours to determine your system is "stable" enough to
maintain these settings in day today running. Also more enjoyably run a CPU intensive game like UT2003 or Battlefield
1942 for an extended period of time. At this point also run your benchmark tests and compare the numbers with those of
your stock performance level. You will more than likely be pleasantly surprised.
|
| |
|
The next sections include memory and bios tweaking and then onto voltages. I’ll just mention at this point if you find
you CPU or memory is not keeping up the voltage section will help, as giving a component extra "juice" will improve the
stability of the component. So if your CPU just falls short of 2.2GHz under prime95, a mere 0.025Volts increase may give
it the extra push it needs, the same also applies to memory. Also if you find the increase in FSB has not has a massive
affect on memory performance there is a perfectly good explanation so check back soon for level 2. (not long honest)
|
| |
|
)